Add AV Equipment/Technical Services to Existing Room Reservation
To add AV Equipment or Technical Services to an existing room reservation, please log into the Event Management System (EMS) then follow the steps below.
CETS' “Daily Schedule” is taken directly from the Event Management System (EMS). All “Additional AV” equipment (meaning, equipment not permanently installed in a room) that has been requested on any given day for a room reservation is automatically a part of that “Daily Schedule” (providing the request is made a minimum of 36 hours prior to the reservation time).
Please be sure to discover the equipment that is permanently installed in the room prior to adding any additional equipment.
Room Equipment Discovery
- Login to EMS (Room Scheduler) using your EUID and Password
- In the left pane, select “Locations”
- Click the room number you are interested in reserving. (This can be done any place within EMS that the room number is visible.)
- Select “Features” tab to display a list of all equipment permanently in that room. Be sure to scroll down as some rooms may have an extensive equipment list
- If what you need is not on the room list of equipment, it may be added to your reservation. See steps below.

Adding Additional AV equipment
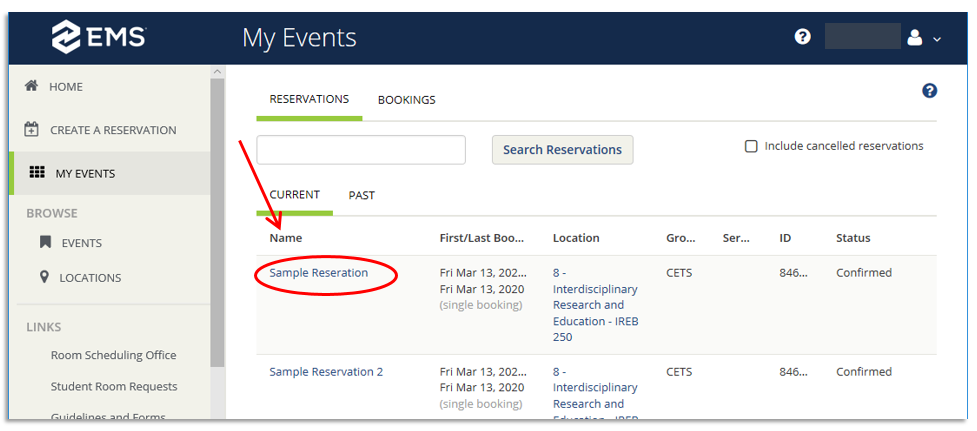
1. After logging into EMS, select “My Events”

2. Select the name of the reservation that you want to have A/V equipment or Technical Services add to.
3. Select “Add Services”
Note: If Services had previously been added, then “View Services | Manage Services” will appear under the applicable booking and can be used to add or remove Services for that booking. (An example of this feature appears in step 10.)

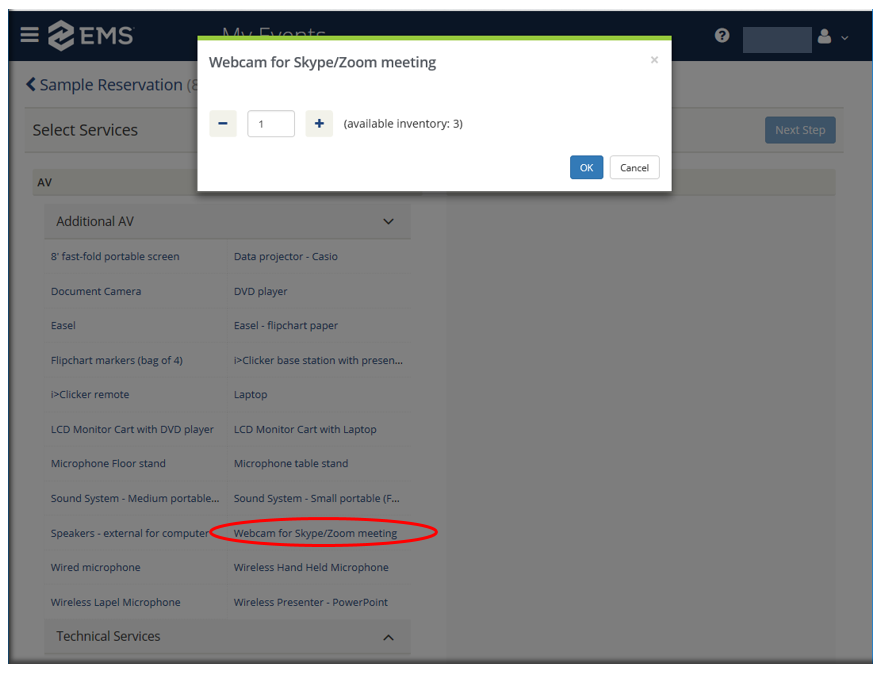
4. Select A/V equipment item to be added.
Notes 1: Please check what equipment is already in the room you have reserved prior to adding additional equipment.
Note 2: IREB rooms do not have the ability to have additional microphones added. Please contact CETS by emailing cets@unthealth.edu or call 817-735-2481 if you have questions

5. Select AV item to be added and enter quantity to be added. Click “OK”
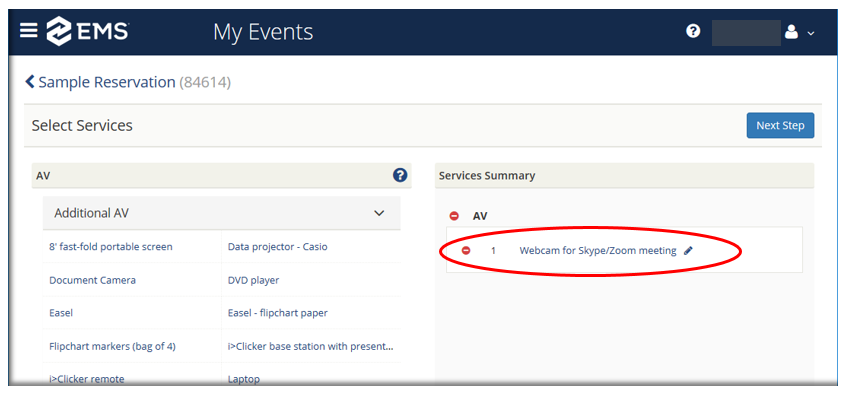
6. The item and quantity appear in the “Services Summary” column.
a. To add more A/V items, repeat steps 4 and 5 until all items have been added.
b. Option: An item can be removed using the red dot with a minus sign.
c. Option: An item's quantity can be edited using the pencil icon at the end of the item.
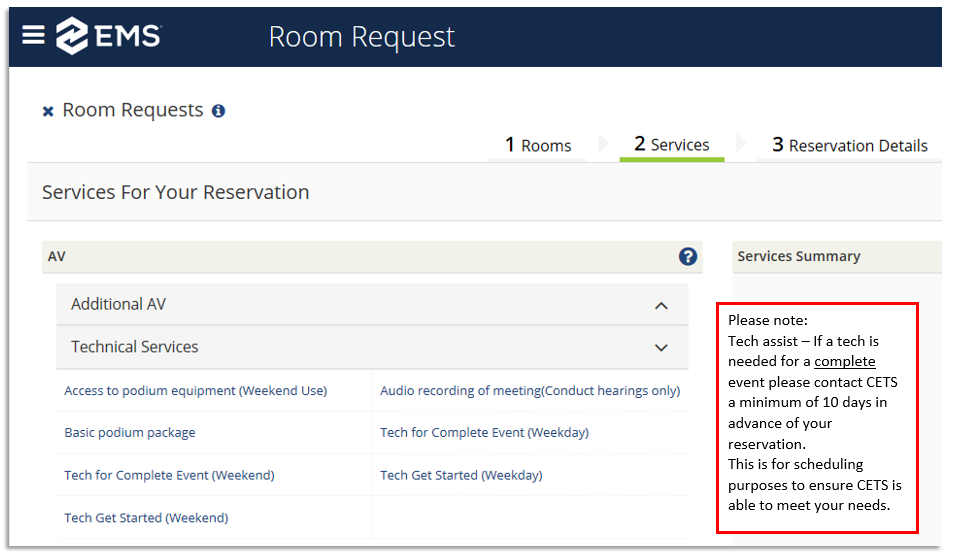
7. Adding “Technical Services”
a. Select the service to be added.
i. Please note, CETS does not have weekend office hours. If you need a Tech on the weekend, please contact CETS at least 10 days in advance of the reservation date by emailing cets@unthealth.edu
ii. Weekend events must request “Access to podium equipment (Weekend Use)” if the room equipment is to be used
b. The quantity for Technical Services will always be “1.” Click “OK.”
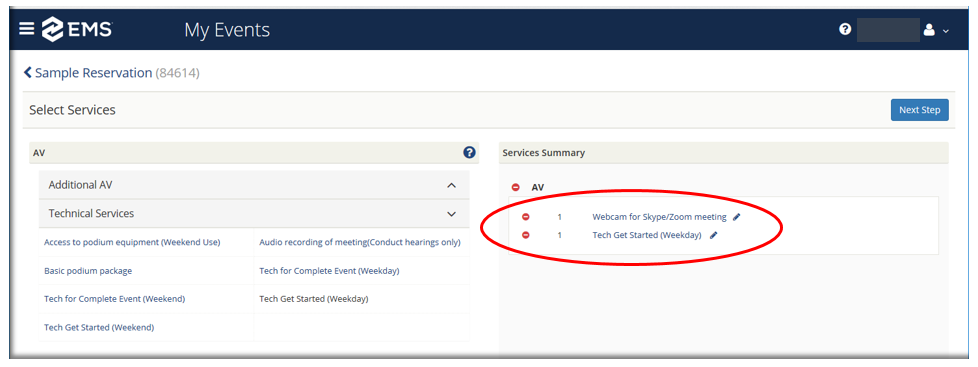
8. Services Summary
a. Check to be sure the Services Summary is correct
b. Click “Next Step” near the top, on the right side of the screen
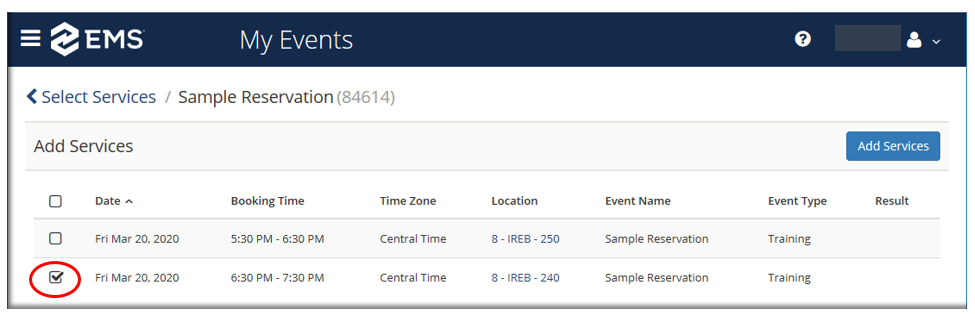
9. Add Services
a. Place a check next to the booking of which the item(s) is/are to be added
b. Click “Add Services,” this will take you back to your Reservation Details page
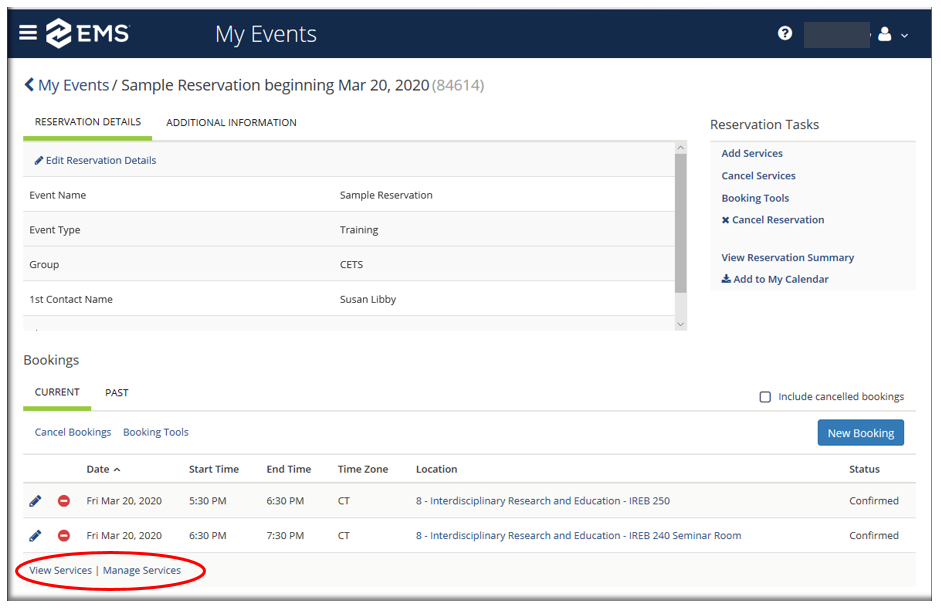
10. View Services | Manage Services
a. Select “View Services” to confirm the items are added as expected.
b. If the Services needed to be deleted or edited, use “Manage Services”
c. Note: In the example used, only the 6:30 – 7:30 in IREB 240 has Services added, if the other booking had additional services it would have its own “View Services | Manage Services”
d. Option: Select the “Additional Information” tab, if a Tech was requested and you wish to have them arrive at a time other than the beginning time of the reservation
11. Select “Edit Additional Information”
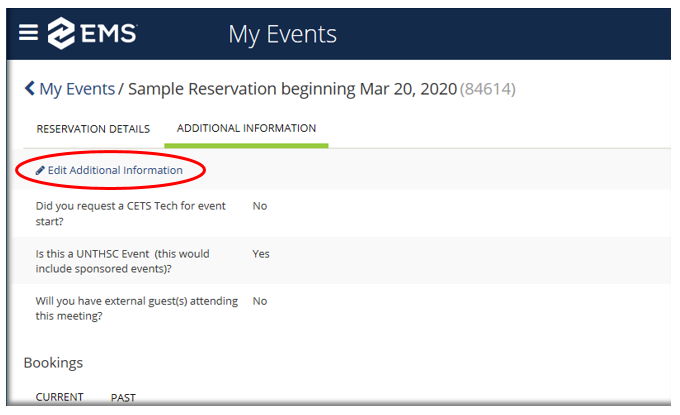
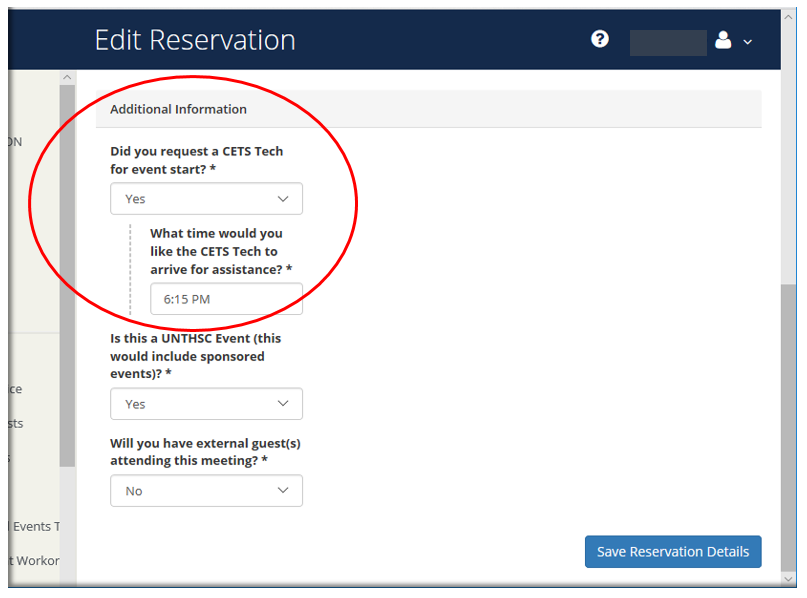
12. Additional Information – Edit
a. “Did you request a CETS Tech for event start?
i. Select “Yes”
b. “What time would you like the CETS Tech to arrive for assistance?
i. Enter the time to arrive only, see example below.
ii. Note: if you feel CETS needs to have additional information, please email it to cets@unthealth.edu
c. Click “Save Reservation Details”